Posted on Leave a comment

9 Helpful Free 3ds Max Scripts from ArchVizTools

When you work with 3ds Max every day—especially in Architectural Visualization—small tools can make a huge difference in speed, clarity, and overall workflow efficiency.
Today, I’m sharing a curated list of nine free scripts from ArchvizTools, one of the most active developers in the ArchViz scripting community. These tools are lightweight, easy to install, and extremely practical for everyday production work.

Each script is compatible with 3ds Max 2018 and higher, and all of them can help you save time, clean messy files, create better-looking scenes, or automate tasks that usually require several manual steps.

Here’s the full list, along with descriptions and links.

1. Layer Manager Extension

A practical enhancement for the standard 3ds Max Layer Manager.
This script helps you keep large scenes organized by expanding the default layer tools and making it easier to manage complex layer structures.

If you work with heavy ArchViz files, imported CAD drawings, or multi-asset scenes, a better layer workflow quickly becomes essential.

Download on Gumroad: Layer Manager Extension – ArchvizTools

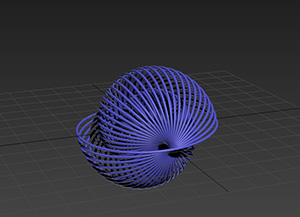
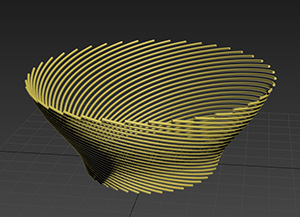
2. Fire Flame Generator

This tool automatically creates flame, fire, or smoke-like shapes using procedurally generated splines.
It’s perfect for:

  • fireplaces
  • candles
  • torches
  • outdoor fire pits
  • atmospheric elements for interior scenes

You get quick, customizable fire effects without relying on heavy simulations or particle systems.

Download on Gumroad: Fire Flame Generator – ArchvizTools

3. Carpet Generator

A surprisingly powerful script that generates realistic carpets and rugs using parametric controls.
You can adjust:

  • dimensions
  • pile height
  • density
  • pattern
  • color
  • and more

Ideal for interior designers, ArchViz artists, and anyone who regularly builds styled interior sets.

Download on Gumroad: Carpet Generator – ArchvizTools

4. Baluster Picker

If your scenes include stairs, balconies, fences, corridors, or classical architecture, this script will save you time.
Baluster Picker lets you quickly browse and insert baluster models directly into your scene.

It’s especially helpful in large architectural projects where railings and decorative elements are repeated dozens of times.

Download on Gumroad: Baluster Picker – ArchvizTools

5. Spotlight Generator

A fast and convenient generator for standard and IES-based spotlights.
Great for lighting:

  • living rooms
  • kitchens
  • galleries
  • product renders
  • detail-oriented interior designs

This script helps you set up lighting structures quickly, then fine-tune them afterward with your preferred render engine.

Download on Gumroad: Spotlight Generator – ArchvizTools

6. Quick Light Generator

A complementary lighting tool that focuses on fast creation of general lights.
Perfect when you need to:

  • set up rough lighting for quick previews
  • iterate multiple lighting moods
  • prototype a scene before final materials and rendering

It’s simple, clean, and a good addition to your light setup toolbox.

Download on Gumroad: Quick Light Generator – ArchvizTools

7. Clay Mode Advanced

If you love “clay renders” or ZBrush/Mudbox-style matcaps, this script is for you.
Clay Mode Advanced applies a configurable clay material to your entire scene or selection using a library of 30 included matcaps.

Use it to:

  • evaluate shapes and proportions
  • create modeling previews
  • generate stylized clay renderings
  • speed up shading-free visualization

Excellent for modeling, look-development, or creating clean previews for clients.

Download on Gumroad: Clay Mode Advanced – ArchvizTools

8. FlatZ

FlatZ is a small but very effective tool—especially when working with CAD files imported into 3ds Max.
It flattens the vertices of shape objects, fixing common problems like:

  • uneven elevations
  • misaligned shapes
  • geometry that should be perfectly flat but isn’t

If you’ve ever imported a messy DWG and found that splines are not perfectly aligned, this script fixes the issue instantly.

A single click, and everything is flattened cleanly.

Download on Gumroad: FlatZ – ArchvizTools

9. PolyCount

PolyCount scans your entire scene, finds every geometric object, and displays a list sorted by polygon count from highest to lowest.

The script allows you to see which assets are consuming the most resources, detect heavy or unoptimized models, and instantly select the problematic objects.

From there, you decide whether to reduce the mesh, convert to proxy, or replace the asset.

It’s simple but surprisingly effective for optimization—especially helpful when you inherit a messy file from someone else.

Download on Gumroad: PolyCount – ArchvizTools

Final Thoughts

These nine free scripts from ArchvizTools are excellent additions to any 3ds Max ArchViz workflow.
Some help you clean up messy scenes, others speed up lighting or modeling tasks, and some are perfect for quickly improving overall productivity.

If you frequently work with large architectural projects—or if you simply enjoy having smart tools to streamline your daily work—these free scripts are definitely worth downloading and testing.

Feel free to try them out, mix them with your existing tools, and experiment with different workflow improvements.
And if you enjoyed this roundup, stay tuned: I’ll continue sharing useful 3ds Max resources, tools, and tips that help optimize real production pipelines.

Share
Posted on Leave a comment

SuperHelix: Quick Video Tutorial Series

SuperHelix is one of the most versatile plugins for 3ds Max, designed to simplify the creation of complex helix-based shapes and procedural structures. To help you maximize its potential, we’ve compiled a series of five video tutorials that cover everything from quick-start basics to advanced practical examples.

Mastering the Gizmo to Shape Custom Helical Splines

Discover how to manipulate the SuperHelix gizmo in 3ds Max to craft various helical shapes and volumes. The gizmo in SuperHelix is an essential tool that offers a live preview of complex helix splines, letting you control everything from the overall flow to individual sections’ size and torsion. Learn to use the Root Helper, Main Path, and Section Controls to create custom helix designs perfect for Motion Graphics, 3D modeling, and animation paths.

Understanding the UI and Key Parameters for Helix Creation

Get a complete overview of the SuperHelix plugin UI in 3ds Max, exploring each parameter to create complex, custom helical splines. Learn how to use presets, manage gizmos, control helix turns and resolution, and apply custom paths. This detailed guide shows how each UI feature works, from setting the curve type to adjusting rotation, adding noise, and even cloning helixes around your chosen path.

Exploring Presets to Create Helical Objects

Explore the presets included in the SuperHelix plugin for 3ds Max to create unique helical spline objects. From springs and cartoon tornadoes to intricate shapes like a ball of wool and a Chinese pagoda, these presets offer an excellent starting point to master SuperHelix. Learn how each preset utilizes different parameters and gizmo structures to achieve specific effects, and see how easy it is to create complex, organic, or geometric shapes with just a few adjustments.

Create a Woven Wicker Basket using Presets

Learn how to create a realistic woven wicker basket using spline curves. Use SuperHelix presets to set up the basis of a basket model entirely made of spline curves. Adjuste the general shapes and gizmos to form the different parts of the basket. Learn tips for creating multiple helical splines aligned radially.

Create Helical Spline Animations Easily

Learn how to create stunning helical spline animations in seconds with SuperHelix. Set the time range and the animation easing and voilá!

Note: If you are interested in making complex spline animations while having detailed control over every aspect and parameter from a user-friendly, centralized interface, see TurboSplines plugin.

You can also find more video tutorials on our Youtube channel.

Share
Posted on Leave a comment

Spline Refiner Tutorial: Subdivide Curves Uniformly

Learn how to achieve perfectly even subdivision on spline curves in 3ds Max with the Spline Refiner plugin!
This quick tutorial shows you how to apply uniform segmentation to curved parts of your spline, ideal for preparing precise meshes for extrusion without losing any detail from your original shape.

Share
Posted on Leave a comment

Scatter Tools Tutorial: Object Placement Tools

Explore 4 versatile scattering methods in Scatter Tools 3ds Max plugin to accurately distribute your objects, try different layouts or dress your interior scene.

  • Scattering over entire surfaces
  • By face orientation
  • Using vertices or spline knots
  • Placing objects at pivot points

 
Share
Posted on Leave a comment

SuperHelix Tutorial: Presets and The Gizmo

Here’s a clear explanation of Presets and The Gizmo in SuperHelix 3dsMax plugin, extracted from the tool’s manual.

The Gizmo

To start using SuperHelix you need to create a gizmo.

The SuperHelix gizmo controls the shape and volume of the resulting helix spline.

Due to the complex procedures that SuperHelix plugin performs, the user cannot see the resulting splines interactively. So, to give the user a live preview of the result, the plugin uses a control gizmo. This a great advantage because it shows a very simple representation of what can be a very complex spline.

The gizmo include 3 type of components:

These 3 elements are simple 3dsMax objects and can be manipulated as so:

For example, you can modify the main path from the Editable Spline parameters, adding more vertices and moving them to change the spline shape. (Although it is preferable to use the “Pick Path” option for working with custom-shaped splines).

You can add or delete circular sections, as well as moving, rotating or scaling them to produce a different shape.

Presets

SuperHelix comes with a set of useful Presets. They are a quick way to start and learn this powerful tool.
You may also create and manipulate your own presets.
Every preset stores the values of all parameters in the UI. The default presets also store a uniquely modifed gizmo each one.

These are the Default Presets and their particular gizmos:

Basic Spring
SuperHelix Presets -Basic Spring GizmoSuperHelix Presets -Basic Spring

Cartoon Tornado
SuperHelix Presets -Cartoon Tornado GizmoSuperHelix Presets -Cartoon Tornado

Ball of Wool
SuperHelix Presets - Ball of Wool GizmoSuperHelix Presets - Ball of Wool

Snail Shell
SuperHelix Presets - Snail Shell GizmoSuperHelix Presets - Snail Shell

Rope
SuperHelix Presets - Rope GizmoSuperHelix Presets - Rope

Chinese Pagoda
SuperHelix Presets - Chinese Pagoda GizmoSuperHelix Presets - Chinese Pagoda

Fruit Basket
SuperHelix Presets - Fruit Basket GizmoSuperHelix Presets - Fruit Basket

Every preset was specially built to show the use of one or more parameters in conjunction with a particular gizmo structure.
For example, the presets Ball of Wool and Snail Shell make use of the Absolute Rotation parameter to achieve a kind of spherical volume.
Rope and Fruit Basket show the use of the Clone circularly tool to generate many helical splines around the path of the gizmo.
Chinese Pagoda shows how a low resolution value can be useful to give a geometrical look to the helix.

Take in consideration that the presets are just a set of predefined parameters and modified gizmos, but any gizmo shape and parameter settings can be achieved by starting from the default Basic Spring preset.

Here’s a Quick Start Tutorial to start playing with Presets and the Gizmo

Share