Posted on Leave a comment

Camera Clipping Pro Tutorial

Installation

The installation of this plugin is done the same way as for all our tools. You can find a detailed explanation in the F.A.Q. page, at the section titled “How do I install and activate Spline Dynamics plugins?“.

How to use it

The use of this tool is very simple and straightforward. Additionally, every button or control in the UI has a descriptive tooltip, so you can quickly get an idea of what they do.
Here are the general steps on how to use it:

  1. Execute the plugin. A small dialog will show up containing just one button with the label “Add Pro Clipping Controls”.
  2. Select the camera you want to assign the special clipping controls to and press the button.
  3. Go to the camera settings in the modifier panel. It will display a new rollout titled “Clipping Controls”.
    (The order in which this rollout appears may vary depending on the type of camera you are using: 3dsMax Physical camera / VRay / Corona )
  4. Use the “Pick object” button in the Near / Far sections to assign an object from the scene to control the corresponding  clipping plane.
    For the Near clipping you will tipically use the object that is blocking the camera view, and for the Far clipping it could be another one in the background.
    If the object you pick has a surface (mesh  or geometry), the plugin will automatically place the clipping plane at the locatoin of the face that is closer to the camera. If not (helper, light, etc.), it will use the object pivot to calculate the distance for clipping.
  5. Optionally set the Offset parameter to position the clipping plane some distance away from the picked object.
  6. Since the clipping planes/s will be now bound to the object/s, you can move your camera towards or away from the target without altering the position of the clipping plane/s.
    Another way to use it is to manually move the picked object/s to change the location of the clipping.
  7. If you want to preserve the framing while you move the camera, then turn on the “Auto-adjust FOV” option.
    This function will modify the FOV / Focal Length interactively while you move the camera forward or backward, so only the perspective of the objects will change but not the general framing.
    This option works only if the main FOV parameter of the camera is active. (It wont change anything if you have the focal length active, except for the Corona camera, which works in both cases.)
  8. Whenever you need, you can remove one or both bound objects by using the small buttons with an “X” next to each “Pick Object” button.

Other Considerations

If you see the clipping planes suddenly jump form one place to another while you move the camera, here’s the explanation and the solution.
That behaviour it’s because the camera might not be “seeing” the picked object anymore at some point, if it’s a mesh. So it starts to use its pivot location as a reference. So a good practice is to plan first if you will need to use a mesh or better use directly a dummy to make sure the script will always use its pivot to calculate the clipping distance.

Removing Clipping Controls / Uninstallation

To remove the custom clipping controls from a camera, use the Remove Clipping Controls button in the UI.

If you don’t have this plugin installed in your 3ds Max, and you open a scene containing a camera with this special Pro clipping controls assigned – or merge one from another file -, the corresponding rollout will show a warning message and the special controllers will be automatically removed. In that case, if you want to completely remove the additional rollout, select the camera and execute this line of code on the listener: custAttributes.delete $ 1
Then, the standard Near/Far clipping parameters will keep the previous values and you will be able to change them manually.

To uninstall the script, use the unistaller.mse file that comes with the script.

That’s all! I hope you found this tutorial helpful. Enjoy the plugin!


Share
Posted on Leave a comment

SuperHelix Tutorial: Jumping Goat Sculpture

jumpingGoat_final

Hello fellows!

The goal of this SuperHelix tutorial is to make an animal, recreating its volume using helical splines. In this case, we chose to do the sculpture of a goat but you can pick any animal you like.

To accomplish that, you should first search for reference images on the web to observe the volume of the animal body. Then, find or make a vector drawing of the profile of the animal in a pose you like. (Here’s the silhouette of the jumping goat to download).

Open 3dsMax and create a plane with this last image in the front view to use as reference.

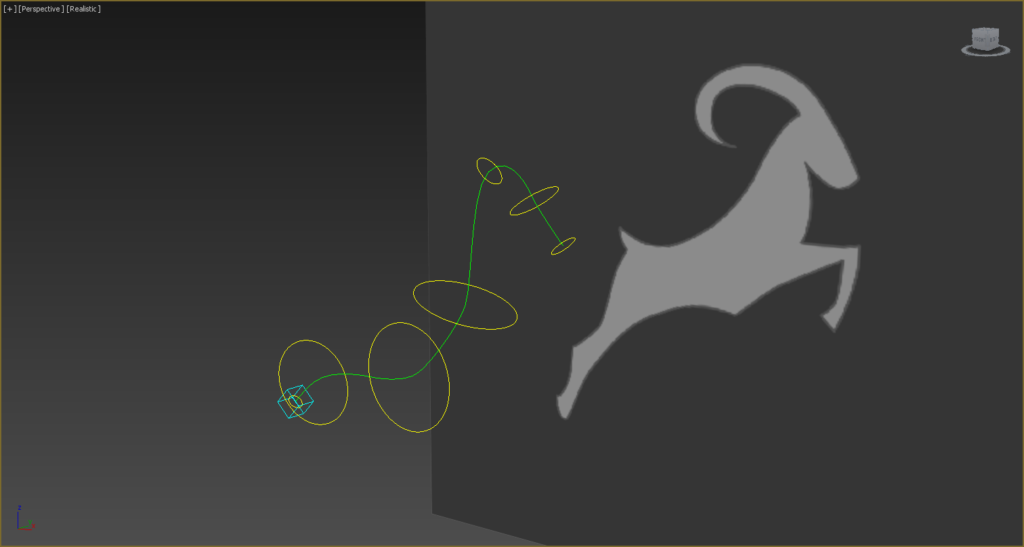
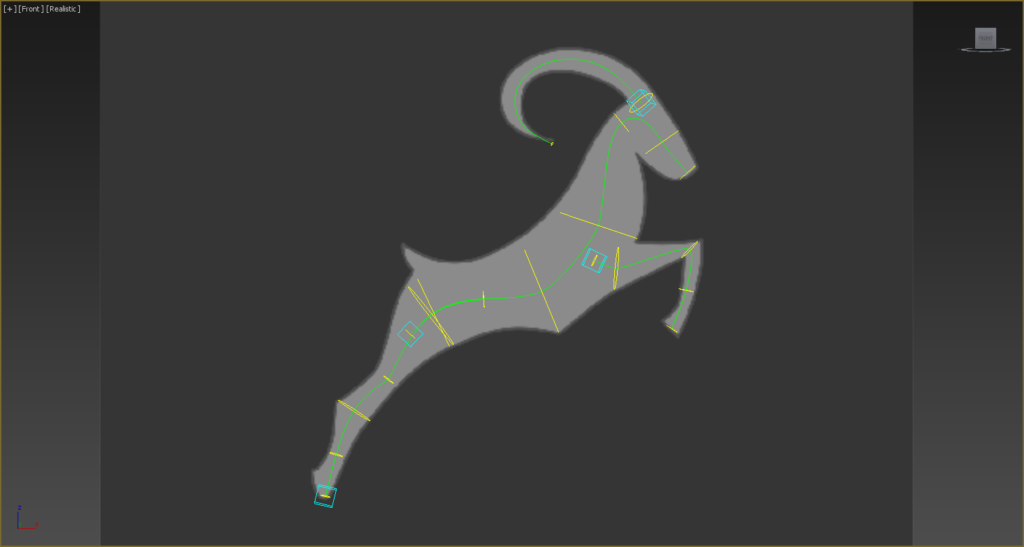
Next, you should draw spline curves along the center of the silhouette. One curve for the body and head, one curve for each limb and another curve for each of the appendices (tail, horns, antennas, etc.). See the image below.

GoatTutorial_01

(In this example, we only needed to draw 4 curves).

Now run SuperHelix to start creating the helical splines.

Hide all curves, except the one for the body, to have a cleaner view.

In Superhelix, create a simple gizmo with the “Basic Spring” default preset.

Then, click “Pick Custom Path” button and select the body curve. The main path of the gizmo is replaced for a copy of the selected curve.

Now click on “Move to path” to align the gizmo to the current curve.

Path_options

Next, you need to create sections along the main path of the gizmo, as if you were placing scale keyframes along an extrusion path.

Tick the checkbox named “Add one section per vertex”. This will help you make things faster.

Then click “Add Section”. One section circle is created at every knot of the curve.

Adjust the scale and rotation of every section to adjust them to the body shape and “flow”.

GoatTutorial_02

GoatTutorial_03

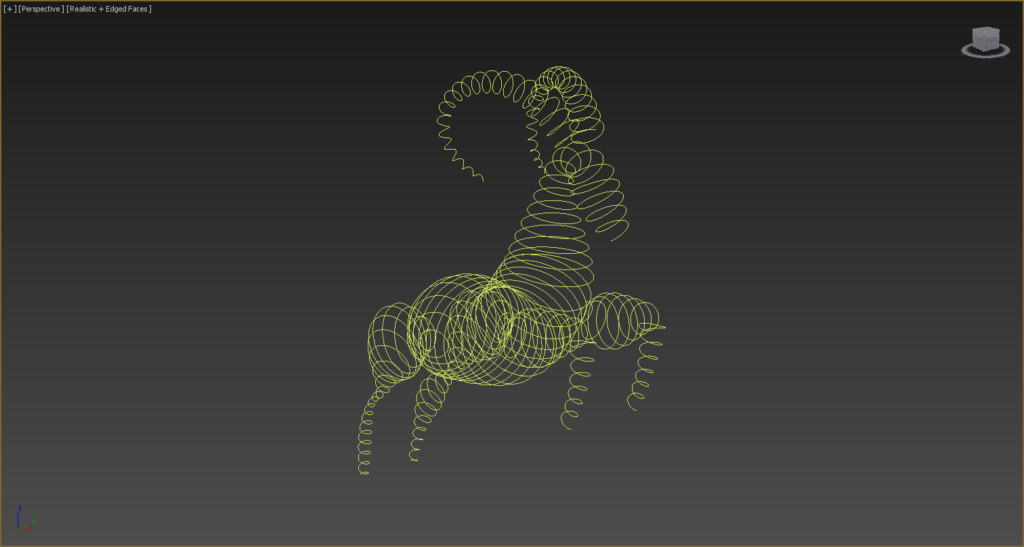
Now click “MAKE HELIX” to see how the resulting helix looks like.

Smile! You almost have the body ready. 🙂

Try varying the thikness of the spline (at the Display/Options rollout) untill you are happy with it.

At this point you’ve probably got the idea of how to continue.

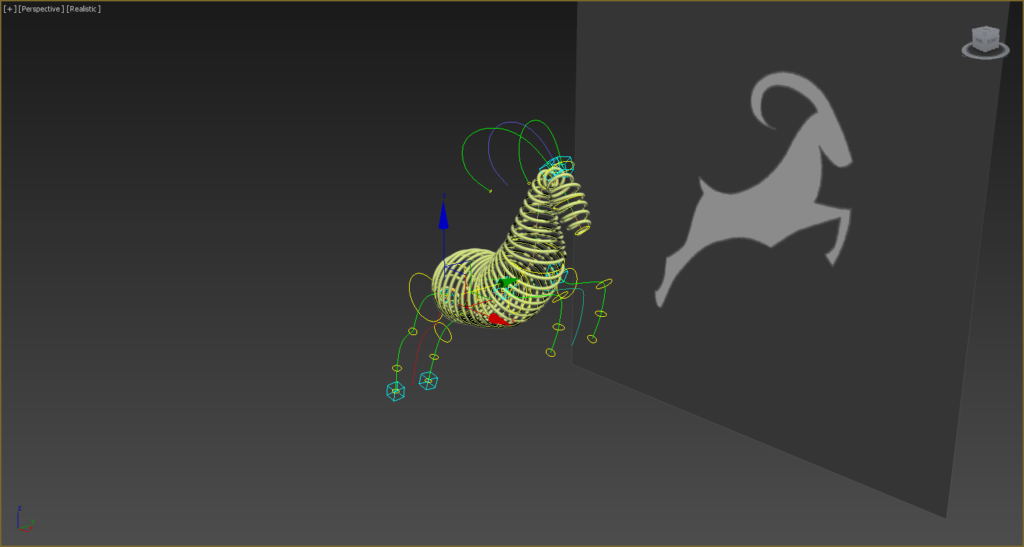
Just repeat the same procedure for all the parts of the animal with the curves you drew. This way you will build all the gizmos you need to generate the splines.

Note for users of SuperHelix Free version:
The Free version can handle only up to 3 gizmos at a time per scene. So, if you need to create more than 3 gizmos, like in this case, do the following:
1. Once you have your first 3 gizmos ready, select them by their layers into the layer manager, and then save the selection to a new .max file.
2. Then, delete them from scene.
This way you are ready to start creating new gizmos and all your gizmos will be saved for future edition.
If you need to do this frequently, consider to purchase SuperHelix Pro for a very affordable price.

GoatTutorial_04

For creating limbs in pairs (for example, for legs and arms), you only need to have one gizmo ready and then duplicate it with the “Duplicate current gizmo” button. It is located below “CREATE GIZMO” and named “DD”.

You can move, rotate or scale the gizmos using the point helper of each gizmo (displayed as a box).

You can also perform a non-uniform scale on section circles to have a better look on joints or other parts.

GoatTutorial_05

Make final adjustments. Try changing the number of turns and the spline thikness. Check the volume and flow in general.

GoatTutorial_08

GoatTutorial_10

That’s all for now!

We hope you enjoyed this tutorial. Cheers!

Share
Posted on Leave a comment

SuperHelix Tutorial: Presets and The Gizmo

Here’s a clear explanation of Presets and The Gizmo in SuperHelix 3dsMax plugin, extracted from the tool’s manual.

The Gizmo

To start using SuperHelix you need to create a gizmo.

The SuperHelix gizmo controls the shape and volume of the resulting helix spline.

Due to the complex procedures that SuperHelix plugin performs, the user cannot see the resulting splines interactively. So, to give the user a live preview of the result, the plugin uses a control gizmo. This a great advantage because it shows a very simple representation of what can be a very complex spline.

The gizmo include 3 type of components:

These 3 elements are simple 3dsMax objects and can be manipulated as so:

For example, you can modify the main path from the Editable Spline parameters, adding more vertices and moving them to change the spline shape. (Although it is preferable to use the “Pick Path” option for working with custom-shaped splines).

You can add or delete circular sections, as well as moving, rotating or scaling them to produce a different shape.

Presets

SuperHelix comes with a set of useful Presets. They are a quick way to start and learn this powerful tool.
You may also create and manipulate your own presets.
Every preset stores the values of all parameters in the UI. The default presets also store a uniquely modifed gizmo each one.

These are the Default Presets and their particular gizmos:

Basic Spring
SuperHelix Presets -Basic Spring GizmoSuperHelix Presets -Basic Spring

Cartoon Tornado
SuperHelix Presets -Cartoon Tornado GizmoSuperHelix Presets -Cartoon Tornado

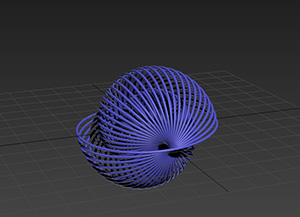
Ball of Wool
SuperHelix Presets - Ball of Wool GizmoSuperHelix Presets - Ball of Wool

Snail Shell
SuperHelix Presets - Snail Shell GizmoSuperHelix Presets - Snail Shell

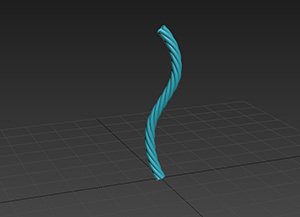
Rope
SuperHelix Presets - Rope GizmoSuperHelix Presets - Rope

Chinese Pagoda
SuperHelix Presets - Chinese Pagoda GizmoSuperHelix Presets - Chinese Pagoda

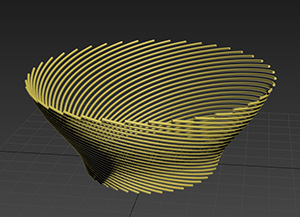
Fruit Basket
SuperHelix Presets - Fruit Basket GizmoSuperHelix Presets - Fruit Basket

Every preset was specially built to show the use of one or more parameters in conjunction with a particular gizmo structure.
For example, the presets Ball of Wool and Snail Shell make use of the Absolute Rotation parameter to achieve a kind of spherical volume.
Rope and Fruit Basket show the use of the Clone circularly tool to generate many helical splines around the path of the gizmo.
Chinese Pagoda shows how a low resolution value can be useful to give a geometrical look to the helix.

Take in consideration that the presets are just a set of predefined parameters and modified gizmos, but any gizmo shape and parameter settings can be achieved by starting from the default Basic Spring preset.

Here’s a Quick Start Tutorial to start playing with Presets and the Gizmo

Share